
Imannotate, opensource collaborative image annotation for machine learning
We made a tool to annotate images with teammates, easy to install and extensible. And obviously, it’s open source!
In the machine learning and deep learning world, one of the most wanted features is to be able to recognize several objects on one image. To be able to do that, you will need to train a model with annotated images. Immanotate is a tool we built to create that annotation data set. Let’s see why it could be the tool that you need over others.
What is “image annotation”?
You certainly already have learned that image recognition is the new Eldorado, especially for the machine learning activity. And you should know that there are two main approaches:
-
CNN that is very common, and can recognize one object in an image
-
R-CNN that is “Recurrent”, and can recognize several objects in an image, and where they are placed
CNN is pretty “simple”: you need a set of images and you train your model with classification outputs. That’s not complicated at all (really, that’s not) and you may create your own CNN with a tiny number of hidden layers. You only need to classify training images in directories or with a simple data file (or database) where each image and corresponding label reside. It’s very easy to make that work.
CNN = One image corresponds to one label. Nothing more.
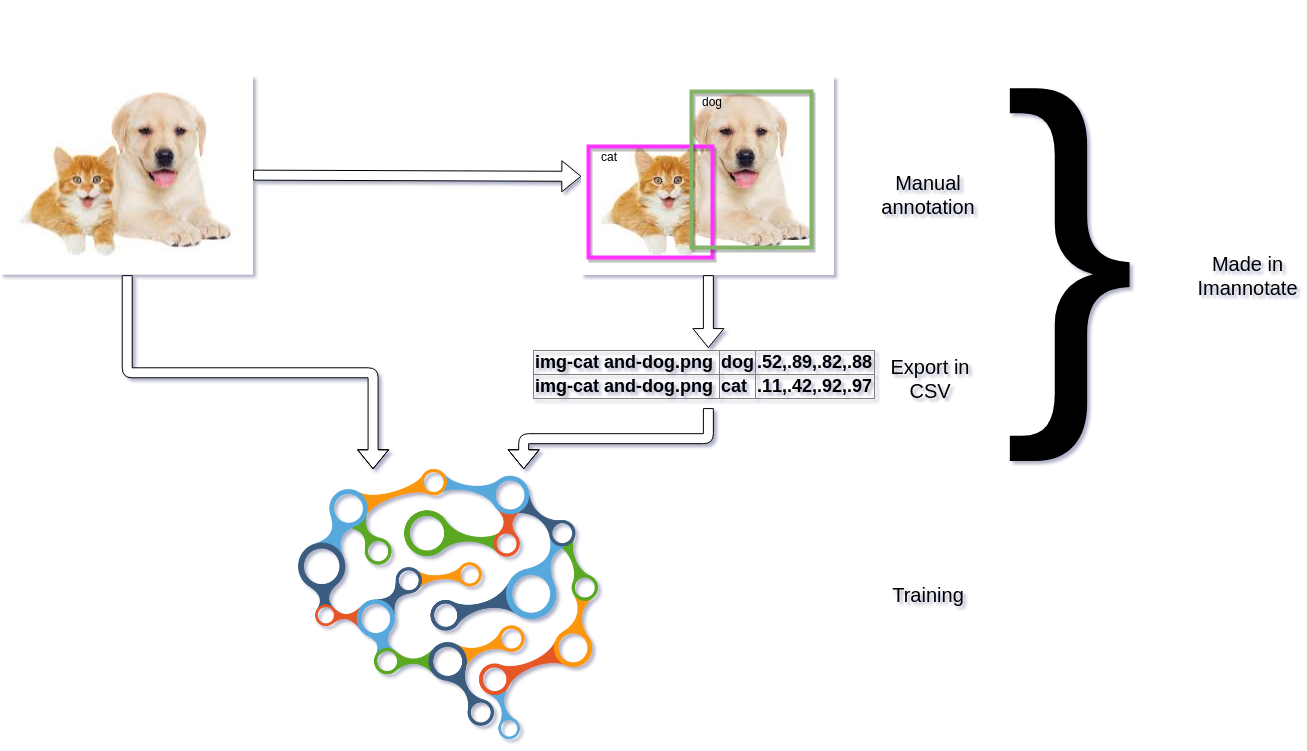
But as soon as you want to train your model to recognize where are these objects, how many and where they are in images… the training phase is a bit harder. Let’s take an example, if we need to find dogs and cats in several images, you can see that an image can have several of them. To train that kind of model, you’ll need to have more information.
R-CNN = One image has got several labels localized in several regions (coordinates)
R-CNN will extract regions with several convolutions and each feature may be sent to other model layers to make the recognition. But at the training phase, you’ll need to help the model to find the objects. So, I repeat, you need to annotate enough of images to give it coordinates where resides the objects you want to find later.
Annotation = Image + coordinates around objects + one label per object
Unfortunately, you’ll need to annotate them by hand… and it’s probably the worst pastime I practised on Sunday.
So you need to store more information:
-
the image path
-
bounding boxes coordinates
-
label for that coordinates
That way, you may have N labels for one image, and that’s very different!
Then you’ll need a special model architecture to be able to send images and labels with coordinates. Even if it’s not the subject of that article, we successfully used Retinanet model for Keras that is very efficient and fast.
Why build our own tool?
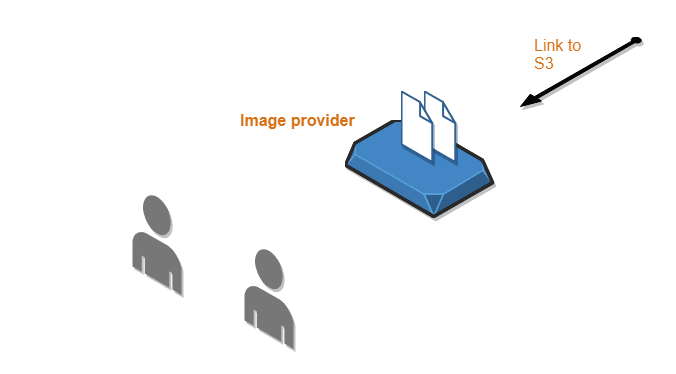
Now you know what you need, so you realize that the task is absolutely huge. For a large number of images, you’ll need to annotate each object getting coordinates and save it somewhere to be treated later. There is a few software made for that work, and all of them are working (more or less). But whatever the tool we tried, there was a little point that avoids us to use it. Mainly: collaboration, storage, image provider. . .
We need to use S3 storage where we can put images, or API to get them from a search engine.
And we wanted to be able to annotate images with a large team. So we needed authentication and project management.
We tried some tools and services. A lot were very nice but each time there was something that was not expected. Once there was no collaborative option, another didn’t have S3 or API entry point, and others were so complicated for the user that we abandoned the idea.
We decided to build our own. Here:
https://github.com/smileinnovation/imannotate
How works Immanotate?
Imannotate is a package, a REST API, and a web user interface. The package and the REST API are built in Golang while the user interface is made in Angular 6.x
Why not Rust, Ruby, React, Vue…? They are very useful and working great, but we had to make choices. Golang is very efficient for the API service (with the gin-tonic framework) and Angular is a good choice in our opinion. Others could work and be very efficient too. The choice is mainly made following author preferences. (Yes, it’s me 😸)
We mainly focused on making the tool “modular” and collaborative. So we take time to implement “interfaces” for the entire management (project, user, authentication, image providers, and so on) — that means that you may create your own image provider for your own constraints, your own authentication for your business, and (not for now, but it will be possible soon) you will be able to mix them.
Wait: that’s the goal, but for now there are still things to fix to make it clean. Keep that in mind if you want to read sources and give a hand.
We provide a full-Mongo implementation to use authentication, project, user management… And later we will provide LDAP authentication.
Also, we provide 2 image providers:
-
Qwant API (while it’s freely available 😌)
-
S3 (and probably Minio later)
In progress: Filesystem storage. That may be surprising to not have built filesystem storage at first, but how a user may put millions of images in the server that serves Imannotate? So, it’s preferable to use distant storage and image API for now.
As soon as you created an annotation project, you may choose which provider to use, and you may share the project with other users.
Immanotate will fetch images and distribute them one by one to users in the annotation view. Also, it avoids double annotation (image is only shown to one user) — if the user didn’t annotate an image (if the user “passes”, or leaves the application without to save current image) so the image is kept being resented to another user.
That’s all, it seems to be easy for users — but that was not so easy to develop. We had to find good ways to avoid doubles, to manage users, project, and shares, and to let others ability to change drivers for “all”.
But now, Immanotate can be installed on servers, we propose it as an open source project and you may use Docker to launch it.
Start it, try it!
The easiest way to make Imannotate working is to use our Docker implementation. You may use the development version that is working a bit slower than the “production” mode.
For both, you’ll need Docker and Docker-Compose, our GitHub README file explain how you may launch Imannotate outside Docker.
Get GitHub project:
1
2
git clone https://github.com/smileinnovation/imannotate.git
cd imannotate
Production version
Now to make it serve as “production”, use that command line:
1
make run
That starts a MongoDB Docker container and the main Imannotate server in a second Docker container that is listening port 8000. Then visit [http://127.0.0.1:8000](http://127.0.0.1:8000) . For that version, the software is delivering API and static files (for the built Angular interface) as it runs in “stand alone”.
Development Version
If you want to use “development” server, that is useful to make Golang and Angular fixes or enhancements, and instantaneously see the changes:
1
make dev
This time, it starts:
-
Angular “ng serve” container to serve UI on port 4200
-
Gin service listening on port 3000 that is a proxy to Imannotate service listening on port 8000. Gin allows rebuilding Golang server when source code is touched.
-
A MongoDB container
-
Nginx container that exposes port 8080 that is used as a reverse proxy to Angular UI and Golang API, which helps not to have CORS problems and to unify URLs.
URL is now [http://127.0.0.1:8080](http://127.0.0.1:8080)
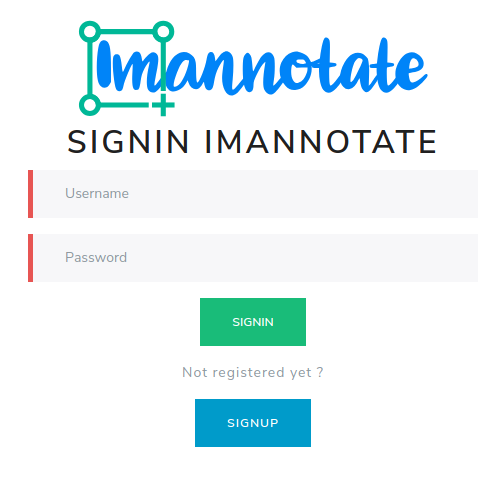
You are now able to log in or create a user:
Annotation Project
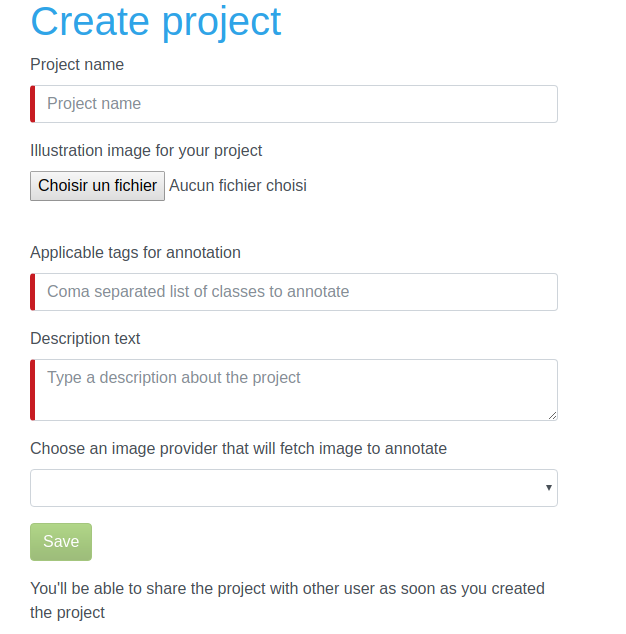
It’s now time to create an annotation project. Name it, add a description and propose some “tags” those are the usable “classes” or “labels” that user will be able to use on the image.
When the project is created, you may propose to share to project with other users. Note that the project can only be edited by the owner (you), other users will only be able to annotate images.
Then, back to the dashboard, the project is now ready.
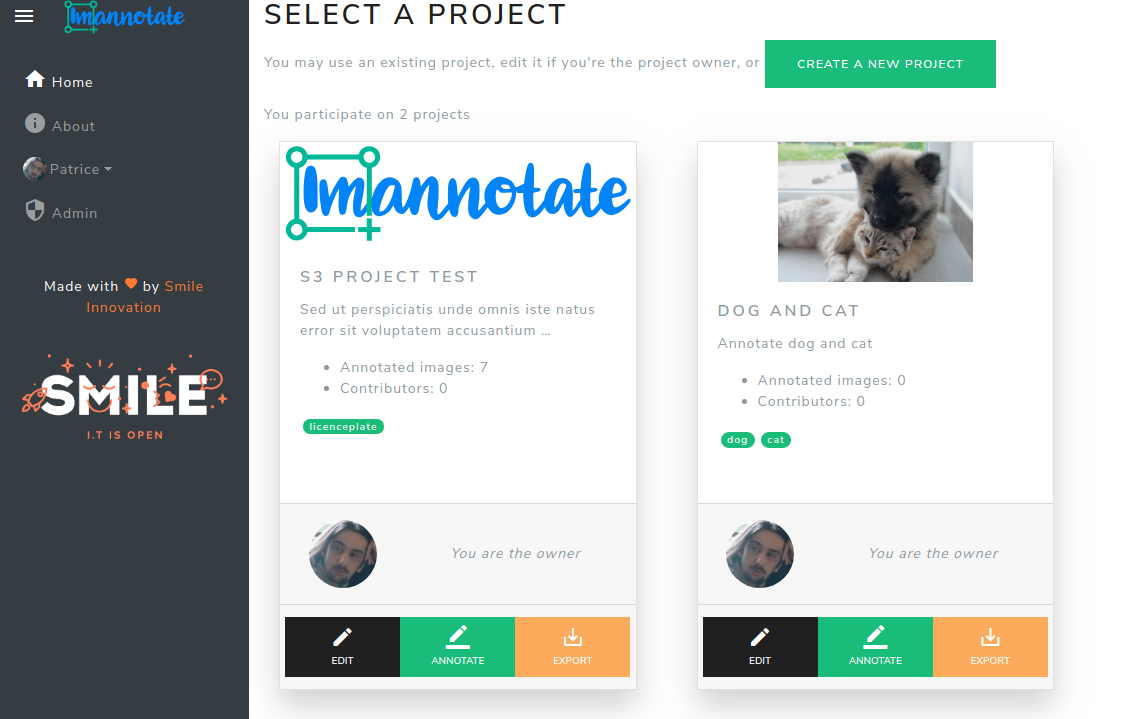
You can now click on “annotate” button to start your annotation job.
That’s easy. If you want to pass an image because you’re not sure, or you don’t know how to annotate this one, click on “pass” button. The image will be back later for you or your contributors. If there is no cat or dog, so press “nothing” button. The annotation will be exported with no bounding box (some machine learning model can use it to enhance the raining phase with images where no labeled object is found).
“Next” button saves the annotation in the database, so you can now get the export data.
Get Data
After having annotated your set, you may return in dashboard and press “export” button. It will download CSV file containing one line per label. Each row contains
-
URL to the image
-
Label name
-
Bounding box information (from 0 to 1)

You may now manipulate this file to download images, and load your data to train your model.
Next improvements
At this time, Imannotate is able to use providers that we have built inside API packages and UI. We need to make it easier to create your own image provider.
We are making Imannotate able to hit “helper” API and “train API” to make it possible to:
-
pre-calculate annotations to help workers to annotate an image
-
launch and train while users are annotating images
Also, we want to provide those options:
-
Provides different exports formats
-
provides different annotation method (circles, polygons, …)
-
an option to provide images in an export archive
-
and many more options than you may imagine
We want to improve user experience and make the annotator component a bit easier to use. Imannotate works on mobile devices (with a touch screen), but it is not so natural to work on. We will make efforts to enhance that.
Help Wanted and Appreciated
At Smile, we love Opensource solutions, we are using them and we’re proud to be the first open-source software integration in Europe. Our solutions are commonly proposed to the community as with open source licence. That means that you can use Imannotate for your own job, and make fixes, enhancements and so on… and you can propose them to us. We will be happy to integrate your corrections and ideas to the solution to grow the fantastic solution that can be.
One last note: we are aware that some parts of the code are not yet well implemented, but we make sure to correct and improve sources and features.
Thanks for reading ! If you want more informations about Imannotate, don’t hesitate to heads to smile.eu . We also publish a fortnightly technology watch newsletter, you can take a look at it online & subscribe !